Service Hotline:400-096-8228

Kunwei Equipment - Bringing Craftsmanship to the Future
Committed to providing you with the most suitable high-performance extruder

This article is from an external website. If there are any errors or omissions, please feel free to correct and discuss.
Operators and factory engineers already know that there are many technologies that can improve the performance of twin screw extruders. However, most of these methods are empirical word-of-mouth and have not appeared in any equipment manuals. They are generally not mentioned in textbooks and technical papers.
But sometimes adjusting a few small details can have a significant impact on the performance of the extruder. These techniques can be divided into three categories: installation techniques, machine maintenance, and program usage. Link to the previous article: Word of mouth! 10 methods to improve the performance of twin screw extruders (Part 1). This article is the next one, and we will continue to introduce five methods to improve the mixing performance of twin screws.
Using lubricants
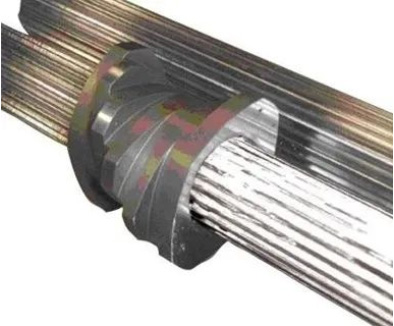
Most people in the plastic industry know the necessity of anti sticking lubricants. There are several different types: copper based, molybdenum, lithium, etc. For things like screws and threaded components, any type can be used. But for the spline shaft of the extruder, the choice of anti jamming is more crucial.

The threaded components are assembled onto the spline shaft with very small gap tolerances, but low viscosity polymers often creep down between adjacent components and enter the gap. As time and heat increase, the degraded polymer will form a high-strength adhesive like epoxy resin. If the screws remain in the extruder and are not periodically disassembled, they may be very difficult to remove from the shaft. This is why the selection of anti jamming agents is so important.
Many types of anti sticking lubricants are acceptable in the short term, but after prolonged use at high temperatures, they will degrade into fine powders. This makes them a poor choice for spline shafts, and when you are preparing to remove screws in months or years, you need higher anti jamming effects.
Regular cleaning
Purging is widely used as a simple method to remove materials from extruders and molds and avoid time-consuming stripping cleaning. There are various types of materials available for extruder cleaning, which are usually divided into two categories: chemical cleaning agents and mechanical abrasive cleaning agents, many of which combine chemical and abrasive effects.
Chemical cleaning agents work by attacking plastic residues like solvents. Many of them also have foaming properties and require "soaking" in a tube for 5 minutes to exert chemical action.
Mechanical abrasive cleaning works by using friction and shear to wash and scrub materials from metal surfaces.
The processor conducted extensive and repeated experiments to find suitable cleaning materials and techniques. But there is no 'magical' cleaning material that is suitable for all materials. However, if you can use fewer materials in commercial cleaning or complete the work faster, the total cost may actually be lower. Therefore, processors will try various materials through extruders to seek cheap and effective cleaning materials.
For example, in the Midwest of the United States, many operators use cow feed corn because it is easy to obtain and the cleaning effect on machines is quite good. Here are two effective homemade scavengers:
Mixture # 1: 50% HDPE (or another high viscosity resin)+50% diatomaceous earth (DE)
DE is a finely ground fossil shell of tiny marine organisms. It is easy to buy in a garden supplies store. DE looks like fine powder, but the particles have very sharp edges and corners, which can cause a scrubbing effect. This cleaning agent can be used for extruding sheets and films, as it can sometimes remove mold lines, saving lengthy mold disassembly time.
Mixture # 2: HDPE or other viscous resin mixed with kitchen cleaner and water
Mix water slurry and three or four cans of kitchen cleaner in a bucket. Feed HDPE at normal blowing rate and temperature, and slowly pour the slurry into the main feed port. The water in the slurry will flash and evaporate into steam, combined with the grinding agent in the kitchen cleaner, which has a very good cleaning effect. (Safety precautions: Warn any nearby operator that steam may escape from the extruder opening. Unless wearing a complete polycarbonate mask and long sleeved shirt, do not look directly at the mold or vent.)
The most important thing is to clean it regularly. The purpose is to prevent old materials from "baking" on metal surfaces. Once this situation occurs, cleaning usually cannot remove the material, and manual stripping cleaning will be the only remedial measure.
One mistake many processors make is to only run cleaning at a fixed screw speed. Changing the speed during this process will be more effective, running at each speed for approximately 30 seconds from low to medium and then to high. This will generate different shear rates on the metal surface, which helps to remove old materials from the cylinder wall.

Efficient conversion
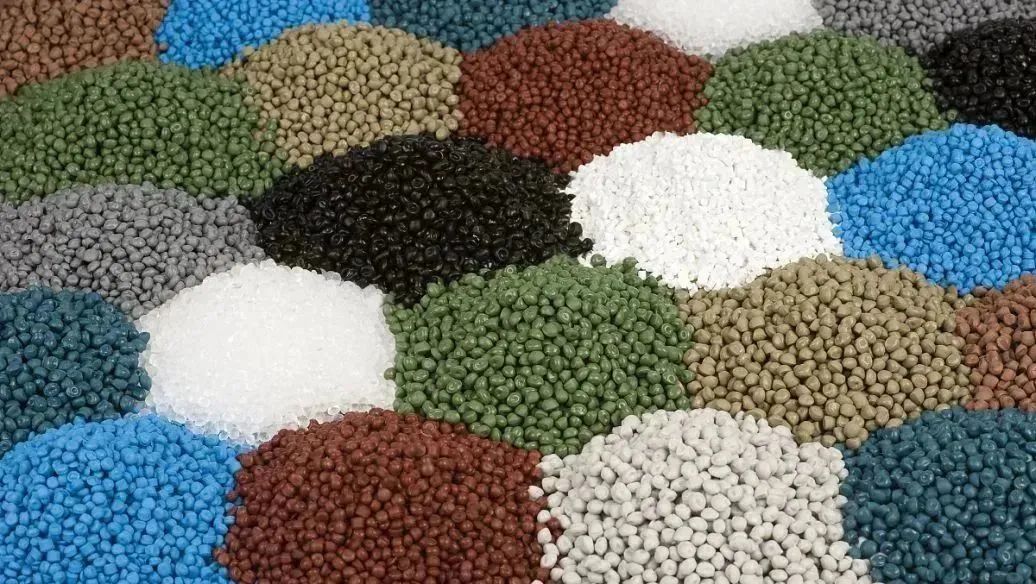
Color or material conversion often leads to problems, and blenders hope to consistently produce the same product for a long time. But in the real world, customer demand means frequent conversion to produce 80 pound product A, followed by 200 pound product B, and so on. Therefore, it is important to switch production in a way that minimizes operator workload and errors:
1. Understand how important cleanliness is for the next product to run. There is an anecdote in any extrusion workshop where someone blows for 16 hours to avoid pulling the screws and brushing them off. The key is, if you know that the next product needs to be thoroughly cleaned with a brush, don't waste time and materials trying to clean without dismantling the machine.
2. If possible, plan to run in descending order according to cleanliness requirements. For example, this means going from light to dark colors. In this way, when transitioning from dark to light, you should only face one difficult transition.
3. Develop written clearance or divestiture procedures to regulate the process of conversion. This helps operators plan their time and avoids future discussions on how many pounds of product must be scrapped due to operators not cleaning the machine correctly.
4. Choose the appropriate size extruder for the required output. This may seem obvious, but many processors did not plan to run the correct machine and ended up running a 500 pound batch on a 75mm extruder, producing 300 pounds of waste while keeping it running normally.
5. Assist operators by placing necessary tools, cleaning supplies, screens, templates, etc. near the extruder. If frequent switching is required, set up a workstation so that the operator has everything they need by their side.
6. Study the flow of raw materials and final products entering and exiting the process area. Try to arrange it as much as possible to reduce the workload of the operators. The fewer times the operators move the material pipes and adjust the conveying equipment, the more they can focus on maximizing operating time.
Warm up/relax the extruder
Extruder workers tend to keep the machine at high temperatures all the time. The operator usually opens the heating area at 7:00 am when entering the factory. If you really want to start the extruder at 8:00 in the morning, there is no problem. But people are often distracted by maintenance work, and the extruder is idle, heating it to full working temperature for several hours at a time.
This is a bad practice as it will cause the polymer to bake onto the screw and barrel. Once baked, the material will continue to degrade and carbonize, making it difficult to remove this material during cleaning. Even worse, when the extruder runs the product, black spots will periodically peel off from the screw and barrel, contaminating the product and causing customer complaints.
The best way to handle preheating is to plan when you really want to start running the extruder. Then, as long as complete preheating and sufficient soaking time are allowed, heating can begin.
There is also a preferred shutdown/cooling program to avoid black spot issues. Before shutting down the extruder, it is best to fill the extruder and die head to the maximum extent possible with some inert polymer (such as HDPE) to "seal" the machine. HDPE displaces oxygen and covers the metal surface to greatly slow down oxidation and carbon formation.
After the extruder is "sealed", it is best to allow the machine to cool quickly, rather than allowing it to cool down due to exposure to ambient air for the next 18 hours. Emergency cooling involves lowering all temperature settings to zero to force the cooling solenoid valve to open. With the operation of the cooling pump, this will force cold water to flow through all parts of the cylinder, resulting in a rapid decrease in temperature. Rapid cooling does not give the polymer a chance to degrade and carbonize.
Focus on key process indicators
Most extruder operators, like experienced pilots, prefer to fly by feeling. Many of them have a keen intuition to know when the process is running normally and when it is not running properly. But as products become increasingly complex and processing windows become tighter, it is best to have some quantitative method to evaluate the operation of the machine.
A common example is when the operator is certain that the materials are somewhat different. The operation of the production line will be very different. If the material supplier is contacted, it may say that their QC records show that the material is the same as before. Without some real numbers, how can you prove to the material supplier and yourself that the materials are indeed different?
• Indicator # 1: Specific throughput
The specific throughput (kg/hr ÷ rpm=kg/hr/rpm) is proportional to the filling degree. Filling is very useful, especially when records of many different products have been saved for a period of time, as it can help you predict how to best run new products. It can also help you plan machine hours, as products that require low fill require longer time to run a certain batch. Finally, the filling degree helps to scale up (or down) the operation on different sizes of extruders.
Indicator # 2: Specific Energy
This must be calculated in two steps:
Kw (application)=kW (motor rated value) ×% torque × Run rpm × 0.97 maximum rpm
Kw (applied) = kW (motor rating) × % torque × running rpm × 0.97 max. rpm.
Specific energy=kW (application) ÷ kg/hr
Specific Energy = kW (applied) ÷ kg/hr
Specific energy defines the power consumed per kilogram of material and the mechanical work performed. Similarly, long-term recording of this number for a specific product is useful. Operators will understand which products are 'energy consuming' and which are not. This will help plan the operation of new products and estimate the production capacity of any given production line.
Specific energy can also help identify problems. If the product always operates at a specific energy of approximately 0.25kW/kg/hr, and if one day it only operates at 0.16kW/kg/hr, and all other conditions are the same, this would be a reason to suspect that the material is different.
9 Guangtai Road, Dujiangyan City, Chengdu City, Sichuan Province
45 Limao Road, Wujin District, Changzhou City, Jiangsu Province
400-096-8228
sales@njkwls.com

Nanjing Kunwei Lansheng Extrusion Intelligent Equipment Co., LTD
Address: No. 9 Guangtai Road, Dujiangyan City, Chengdu City, Sichuan Province
45 Limao Road, Wujin District, Changzhou City, Jiangsu Province
Tel:400-096-8228
E-mail:sales@njkwls.com